Effortlessly Generate Quote with airSlate SignNow
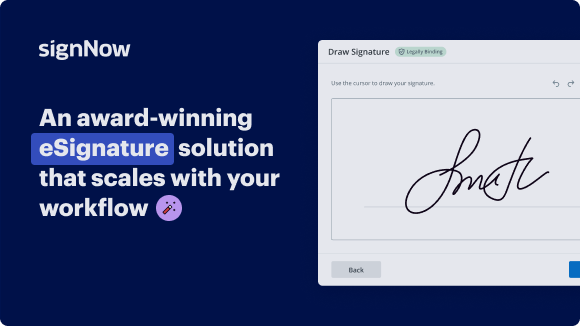
Award-winning eSignature solution


Move your business forward with the airSlate SignNow eSignature solution
Add your legally binding signature
Integrate via API
Send conditional documents
Share documents via an invite link
Save time with reusable templates
Improve team collaboration
See airSlate SignNow eSignatures in action


airSlate SignNow solutions for better efficiency
Our user reviews speak for themselves


Why choose airSlate SignNow
-
Free 7-day trial. Choose the plan you need and try it risk-free.
-
Honest pricing for full-featured plans. airSlate SignNow offers subscription plans with no overages or hidden fees at renewal.
-
Enterprise-grade security. airSlate SignNow helps you comply with global security standards.

airSlate SignNow features that users love


Get legally-binding signatures now!
FAQs
-
How can I generate a quote using airSlate SignNow?
To generate a quote using airSlate SignNow, simply log in to your account, navigate to the 'Quotes' section, and fill out the necessary details for your document. Our user-friendly interface makes it easy to customize your quote to meet your business needs. Once you're satisfied with your customization, you can send it out for eSigning instantly. -
What features does airSlate SignNow offer for generating quotes?
airSlate SignNow offers a variety of features designed to enhance your experience when you generate a quote. You can create templates for recurring quotes, attach relevant documents, and set up workflows for easy approval. Additionally, our robust analytics help you track the status of sent quotes for better visibility. -
Is there a cost associated with using airSlate SignNow to generate quotes?
Yes, airSlate SignNow operates on a subscription model with various pricing tiers to accommodate different business sizes. To generate quotes, you can choose a plan that best fits your needs, and you will also have access to other functionalities designed to streamline your document management process. -
Can I integrate airSlate SignNow with other tools to improve quote generation?
Absolutely! airSlate SignNow seamlessly integrates with popular tools like Salesforce, Zapier, and various CRM platforms to enhance your ability to generate quotes. These integrations allow for centralized document management, enabling you to streamline your workflow and improve overall efficiency in your quote generation process. -
How does airSlate SignNow ensure the security of my quotes?
Security is a top priority for airSlate SignNow when you generate a quote. We utilize advanced encryption protocols and secure data storage to protect your documents. Additionally, our platform complies with various industry standards and regulations, ensuring that your sensitive information remains safe. -
Can I edit a quote after I have generated it?
Yes, you can easily edit a quote after you have generated it in airSlate SignNow. Simply access the quote within your dashboard, make the necessary changes, and save or resend it for signatures. This flexibility allows you to make real-time adjustments according to your clients' needs. -
Does airSlate SignNow support electronic signatures on generated quotes?
Yes, airSlate SignNow fully supports electronic signatures on all quotes you generate. This functionality allows your clients to sign documents securely and conveniently. It not only speeds up the approval process but also provides a legally binding solution that enhances your business operations. -
What type of customer support does airSlate SignNow offer for generating quotes?
airSlate SignNow provides robust customer support to assist you in generating quotes. Our support team is available through various channels, including live chat, email, and phone. Additionally, we offer comprehensive online resources and tutorials to help you maximize the use of our platform for efficient quote generation.
What active users are saying — generate quote


Related searches to Effortlessly generate quote with airSlate airSlate SignNow

Generate quote
[Music] hello everyone welcome to the salesforce cpq video series in today's session we will be looking at code documents i am sudha sundhram i have 12 plus years of experience predominantly in the sales force in the agile world i have 11 salesforce.com certifications which include application architect and sales for cpq specialist i'm also a trailblazer mentor here are my linkedin and treasurer handles if you would like to follow me please feel free to so far we covered the c and p aspects of the cpq right we looked at configuring products pricing products and now we will look at the queue part of sales for cpq the code proposal generation in today's session we will look about the document generation capabilities of sales for cpq we would look at an overview of document generation we would look at what template contents are and how do we create them we would look at the types of content i've listed the three mostly used types of content here the html line items and code terms we will take a look at how do we embed additional documentations document file formats and permissions and finally we will touch upon e-signature integration after we have gone through the process of putting together a code selecting the right products applying discounts if necessary it is time to go ahead and generate a document to put in front of your customer right so we have customer information code information we have line items we have product pricing and discounting data all in our code so the salesforce apq document engine combines this information altogether merges it into templates in order to allow sales reps to go and generate a professional looking codes and proposal document with a single click so that is how we generate documents in sales for cpq so let's quickly jump into our salesforce picker application to see where and how we generate a document we are in our code right now and uh in honor code itself we have a quite a lot of information right we have some basic code information like code number the type of the code the opportunities associated to the account it's being associated to and if i scroll down we'll also see some address information like the bill to address and the ship to address here and if i click on edit lines uh it would take us to the code line editor and here we will see all the code lines that are associated to this particular code so this has some iphone 12 products and 15 inch laptop products which are the code lines associated with this code and here we also see the quantity the price and if there is any additional discount applied then even that comes here and we have the net unit price for these products so all these information is there in the code right so once we decide we need to send a code proposal document to the customer the sales rep can go here and either click on a preview document or generate document to generate the document and send to the customer so let me go ahead and quickly show you how a document looks like so when i click on preview document i see a few things here like document options it asks me what document language i want this document to be generated in the template the paper size and down i have the content the template content itself which has the code template content here so once i click on preview this is how my document would look like so if i scroll down here i see a company logo here and there's a header this is like a cover letter which has some information for the customer and if we scroll down here i'm seeing who is it prepared for and who was it prepared by and there is some address information as well here and if i move down i see a lot of line items listed here and they are kind of grouped by product family and there are some terms and conditions at the end of this document and finally a signature block so this is how a typical code document would look like right so there are some static content here there are some dynamic content here so when i say static content the date expires on these labels are static right and the same for the address information so the prepared for the header by itself is a static content and prepared by the static content while the address information itself is a dynamic content so we are trying to pull it based on the selected code information and try to populate it here so this is how a typical document would look like and let us now go and see how do we build and get this document in this particular shape so we define individual contents first and then work through the process of assembling an entire code template out of it so if you look at my slide here i have cover page customer information line items discount detail and a signature block so these are individual snippets of contents right so first we need to start defining the content itself before we start building the code template out of it we then link these pieces of content up to a code template so the reason we do it this way is that we may want to reuse these pieces of content in multiple code templates so if you see here i have two code templates and i could reuse the same piece of template contents at these two different code templates right the content is defined just once and it can be reused across multiple code templates so if you define these particular content that you see here the cover page customer information line items discount details signature block in this nice modular fashion then that helps us to go ahead and slot them into really as many code templates as we want and the way we join these up is by creating something called as a template sections that are specific to the code template itself so this is just really a link between a piece of template content and the code template itself so if you notice here i have a code template a and a code template b and i'm trying to use this same content in a different fashion you know i've uh put a customer information discount detail line items and signature block here where and i have just covered page line items and signature block in my other code template but really the linkage here is through the template sections itself so remember whenever you're working to define a document you should start by thinking about what are the individual pieces of content that we need to go into the document first so get that content generated and then work on slotting them into the actual code template themselves so the real first step for us to start building a document is by defining the template contents so to summarize how the document generation works we start by defining the individual template contents and we use the sections to link the piece of template content we define to the code template itself and the same template content can be used in multiple code templates in a similar fashion by using sections to link them uh the content to the code template and finally in generating the code document what are the different types of content we could generate on sales for cpq so there are five major types of content we could generate and the three most popular ones are html line items code terms and the two not so frequently used ones are custom and then we have the template bottom and the template top let's look at each of this in detail so the first one is a html right so this is really a free form content almost like your microsoft word document with like mail merge fields you have a static content and then you have some merge fields to dynamically fold in information specific to the code a typical example here would be what we saw right now in our demo so we were on our code and we tried to generate the code document we had the prepared for and prepared by which are the static content and then we had the address which was a dynamic content which is specifically folded in from the code information the same would be applicable to a cover letter or a cover page or if you want to add build to ship to information or even a signature block so these would all fall under html the next second type of uh content is the line items so this is really the details about the coat lines right the products the quantities the price and discount related to it so the detail about the line items are usually presented in a table format or we could go ahead and group by a product family or anything any other relevant fields and also display us separate tables or we can have them uh control the columns that we display so you want a column to be displayed dynamically only on certain conditions we could do that as well we would look at it in detail when we jump into the line items content type the third type is the code term so core terms are nothing but terms and conditions and simple terminology so we have some special functionality related to terms and conditions and sales for cpq this is a little bit more intelligent with dynamic capabilities around the code term content so the next one is the custom type of content so this basically allows us to display a visual force page within the section of our code template the last two which are more similar to the html types they are template bottom and the template top so template bottom is typically used for including notes dates and you know final signature information uh while template top can be used for including logos like company logos or street address and ship to our built-in details they operate in a very similar fashion to the html type of content we are back in salesforce let's quickly take a look at how do we create this template content so there is a separate object for template content if you click on that and if you click on new you'd be able to start building your template content so if you notice here we see a type of this content that's the first question that it asks and it has all the six different types of content that we looked at earlier we just need to start clicking on whichever we want to get started here just gonna hit cancel because i already have template contents created for demo purposes i'm just gonna pick something and uh walk you through it so this is a html template content that i built for cover letter right so if you notice here there are quite a few fields one is the content name itself give a name for your template content and there are some font text color type and font size here the type typically takes from the type of content you picked earlier in the step and if you notice here we have something called as the markup field so this is where we will be doing all our editing for the html sections so if i click on edit here you will notice this wizard wig editor and there are quite a bit of formatting controls that you would see here you could uh play with all these there are font sizes different styles you could use for formatting their styling options uh which we can use for building your content and if you also notice here this is going to be a mix of static and dynamic content here there are some headers like date expires on if i scroll down a little further there are quite a bit of static content here phone email so these are all going to be the static content and if you notice here we see something with these brackets between the brackets right so these are the merge fields which are typically used for getting the dynamic folding and information from a number of places on your code like customer informations or any other related information from your code to dynamically get folded into your document so that's why we use these merge fields first so this in this html type of content you have a mixture of the static and the dynamic content displayed here uh one thing very particular uh to be noted for merged fields is there's a particular syntax for these merge fields that we need to be aware of let us quickly jump in back to our slides to look at them in detail we need the curly brackets around the merge field syntax we need the exclamation point at the beginning and then it's object name dot field name and there are five objects that we can source the data from in the html sections so with the html template content we don't need the objects api name but the shortened name like the document engine is expecting so be careful about the upper case and lower case when you give the object name ensure you're giving the correct name um because salesforce cpq is going to be a little silly about that and when it comes to the field name we need the full api name for the syntax here so if you look at this table here we have five different objects the code code template the primary contact on the salesforce cpq's object code object and then the sales rep on the salesforce cpq code object and the code document so these are the records we can reference in our merge fields uh and this is the the second column here gives you how the merge field appearance happens so it is like exclamatory code dot for code and exclamatory template dot for template followed by your field name right so i've given few examples here so if you want to dynamically fold in a build a building name uh from your code so this is the typical syntax that you would use you would use the brackets and then you have an exclamatory mark code dot because it's going to take it from the court object and the field it's interested in is the billing name so i've used the fields api name here sbq underscore underscore billing name underscore underscore c for instance the same is applicable for the reminder of the objects that are listed here so be very careful about the syntax that you use for the merge fields in the html section you could also create formula fields on these object to replicate data from the other object for instance you can create a code formula field to render an opportunity or an account field uh this this is being mentioned here typically because merge fields are html section can only come from the above mentioned objects here and one other thing to note is there is no way to directly reference code line data in the html section so code line data is always going to be displayed in the code line section so if you remember in our different types of content we had html and then we had a code line so that is what we would be using to get the code line information we are back in our sales for cpq application and one other thing i want to mention here is if you would like to work with html and css directly you can use the source button that you see here and jump into it and you can directly make the edits as well so this is typically how we create the html type of content it's not too difficult you just need to take care of your syntax around the merge fields and uh determine what content needs to go into this html template have it styled uh by the way your business wants and you would be done here now that we have our html template content ready let's quickly go ahead and see how do we link this to the code template itself so i'm going to quickly navigate to the code templates and i've already created one for the demo purposes so i'm going to click on that let's quickly look at what fields we have here right so we have a template name uh we have the deployment status do you want this to be your default template so you can have multiple code templates right so if you want this to be your default then you can select this there is a logo document id this is nothing but if you have a company logo which you want to be available in your document then you could go to your documents folder upload that particular logo there and then get the record id and populate populate it back here so uh this particular template will take that logo document id and get your image and put it on your document and then if i scroll down a little further you will see quite a bit of details there are some page information here you can define your page with how much margin you want uh what's your page height all that can be defined here and quite a bit of controls and on your header footer information if you want your header or footer to be visible then you could give all the different styling options for that as well here and if i move further down i have some corporate information which is standard and then the style information i can define my font family the font size the border color the shading color and all that information and also my group style information here so there's quite a bit of detail when we come in here to the code template more uh with respect to how we want the document to look like what kind of style what kind of font what kind of details we want to go in from a template itself and then if i scroll down a little further there are some print options here we will touch upon some of these uh later in our session as we uh uh you know go deep into each of these template contents and sections but uh just to give you an overview this is all that we see on the template code template itself so now we have a code template how do we link the template content we created to this for this particular code template so for that if we go into the related we will see a few sections here one is line column other is a sections and the third is a additional document so to just give you an overview what what each of these sections mean align columns is nothing but uh these are the columns that are going to appear when you have your line item content type being added to this particular code template and when you have those tables these are the typical line item columns that might appear either conditionally or always on your code template and if i scroll down a little further we see sections sections are the typical link between your template content and the code template itself if you remember we had talked about this earlier so for example we created a cover page html template content now so the cover letter section is going to be the link between the content and this particular code template itself so if you will see here that i have a section name and then you see the template itself so this is my code template i'm linking the code template with the content so this is how one single content can be used across multiple different code templates all you need to do is go ahead and create a section and create the link between the content and the template and display order is typically the order in which you want this particular section to display remember the same best practice that we have talked earlier give a lot of gaps between them so if you want to come in and fit in a different section later in time it's easy without going and renumbering a bunch of them and similar to what we saw in the template itself we have a quite a bunch of fields around the margin and the border color and you know the if you want to hide the column header we could say that here as well and we'll touch upon this conditional print field later and then more from uh look perspective there are things around page breaks uh if you can say whether you want a page break after this particular section you want before or after or at both places and things like that and we also have a filtering information if you would like to filter based on a particular field and value here so if you look here we have created a section to link the content that we created to this particular template so this is how we link a content to a template through a template section now that we looked at what html template content type is let's move on with the line item type of content so the line item type of content is typically used to display the code line data in a table format right so in our document we looked at a table like this with different columns which typically shows the code line the product information the price information the discount information the overall price information and things like that which are related to the code line data so that is what a line items section is going to be used for there are a couple of advanced line item functionalities i would like to touch upon here so one is a group and subtotals so we have a field called group in the line items section to group the line items so what this group field will do is the line item will automatically sort themselves into proper groups and subtotal correctly if you notice here what we have done from a configuration standpoint is i had grouped by product family so what has happened here is if my coat lines belong to support and apple watch product family then they get split into two different tables based on the product family if you have hardware and software then we would have two more tables with my coat line items you know categorized into those groups and we would also see the subtotal information like it is here uh automatically so we do not uh have a necessity to create multiple line item sections to achieve this we could just do it with one line item section by using this group field to achieve the groups and subtotals one other advanced line item functionality we have in sales for cpq as conditional print fields so we could show or hide columns dynamically using this conditional print field so you can use a code level field to decide whether a particular line column is rendered or not for example say for instance like you have a discount percentage column line column right so we don't want to show this always for all our codes but we just want for those codes which have a discount applied because we just don't want to show an empty column right so if that is your use case then you could use the conditional print field to show this particular column only if a particular check box is checked say for example if i have a custom check box field created on my code saying show discounts and as a sales rep i go and say before generating this code document that please show discounts on my code document then what salesforce cpq will automatically do is it will automatically go and render this particular line column called discount percentage on your line items table in your code document once it is generated and if this check box is set to false then this column is going to be suppressed it will not be shown on your code document so the only thing that you need to notice this field needs to contain a boolean value it should be a true or false because the true is going to cause the line item column to render and the fault is going to suppress it so the same functionality can be used on sections as well you can show or hide a section in the document using the conditional print field but in the template section if you use the one that's on the template section it's going to either show or hide based on the value that you're going to reference here it's the same condition again here use a boolean value field which will have either a true or a false and a typical example here would be like a cover letter needed right so you don't want a cover letter to be attached on all your codes then you could just have a custom field created cover letter needed on your code and the sales strip can check that if he wants to include a cover letter on the code document so then what would it would do is it would go ahead and enable the section based on this field's value on your code now let me see uh this an action right how do we create the line item template content how do we link it to your code template how do we define the code line columns so i'm on the template content and i already have one content created for my line items so this is going to be fairly simple it just has the content name and the type should be line items the remaining is the same the font family text color font size table style you could give all that here it's it's fairly simple not even as complicated as html template content type here we are going to do the reminder of the configuration on our code template itself so if i jump back to my code template if you remember we saw a few sections on its related tab uh so one is the line columns which we're going to come back just in a minute and then the sections right so we need to create a section uh to reference the content that we have created to this particular code template so i have created a line item section here it's the same old fields that we looked at earlier and if you notice here i have linked the content that we created to this particular code template right so since this is a table i just picked to use a border color uh you you can use any color you want or you can leave it to the default so remember this is going to be the hexadecimal value so ensure you're using the right value for the right color here and i'm going to jump back to the related on my template so if you look here oh we have uh line columns right so we need to tell salesforce cpq which columns to display in the table right in the content we define the line item content it's just like a more like a placeholder this is where we're defining what columns we want to display in that particular table that lives on the code template which is in the related list here under the line columns so if i click on one of this you would see that we have a column header whatever you want the header to be you just give that here and then there is this display order where do you want to display this particular column in relation to an other columns that you have in this table again the same best practice leave some gaps so that you were able to come and add anything else later if the need be without reordering too many of them and then you have a width here and then there is a field name basically this is where you are instructing salesforce that i need the value for this column to come from this particular field so please use the fields api name here and one thing with respect to the width is uh it's technically the width of the column right it is percentage the width of all the columns that you have in a table should add up to 100 100 percent so just to make it look nice ensure that width of all the columns add up to 100 once you've defined all your line columns and then if i scroll down there are some basic formatting like alignment which can be done you can say you want it to the left you want it to the right if you notice here typically like how we would align your table and then you have the font options the styling information here you could use them if need be and then there is a quite a bunch of uh fields here as well right so this is what we talked about the conditional print field so if you want this particular line column which we have created to only come up based on a value selected on your code then that's what we would populate here i'm quickly going to jump back so i can show you one column which have created with the conditional print field on so it's discount percentage so if you notice here what i have done is i have given a show discount um field as my conditional print failure so what this is going to do is this column will only be rendered if my show discount i've created this custom field and i have included in the page layout for my quotes and once a sales trip selects this show discount checkbox as yes on my code only then this particular column will be rendered if that is not set to true and if it's basically unchecked then that this column will not be rendered on your code line table for the section in your code document right and let's quickly go back to our template and i want to quickly show you about how we have grouped this right we've said we want to group it by product family so for that if i go back to my section here the line item section if you see here there is something called as a group field so this is where we say how i want my line items to be grouped i for my use case here i have done by product family so you can actually go ahead and add a field if you're not seeing it here please go ahead and have the field api name to this particular pick list so that you see the options here since i wanted to use the product family i've just picked the product family and that is the reason we see our coat line split into uh beautiful small little groups based on the product family and we were able to see the subtotals in our code document let me quickly cancel here and yeah that's pretty much it right so this is how we create uh line item content which is fairly simple just choose the type of content to be line item you come back to your code template create a section to link your content to your code template and ensure you define all your line columns uh neatly whichever column you want to be displayed on your table and ensure you make use of the conditional print field if you want to dynamically displace your height columns and also the grouping functionality that sales for cpq offers if you want to neatly group your line items into a smaller group of product family or any other field that you choose to on your quote lines and use these two functions to your advantage uh one important thing that i also want to cover is it is possible to create uh multiple line item sections for the same code template right so you can have multiple uh sections for line items here it is possible so line columns can be assigned to a particular section or you can use it a cross section so if you want to generate multiple line item sections with the same columns or different columns we could do that so if we do not specify the section on the line column then it is going to apply to every line item section in the entire document so if i jump into any of the line column you have a field for a section here so if it's technically blank then it's going to apply this column for any other line item section if i have multiple line item sections on this code document this column is going to be available for all of them if i specify it only to a particular section then this is going to be available only on that line item section of the code document so this is one important thing to note of before we get on to our next type of content now that we uh built the html type of content and the next type of content the line item type of content let's quickly get on our code and see how this all comes into play right so what i'm going to do is i'm going to show you two things so once i'm going to preview document and i'm going to just say preview here so if you notice here we have our logo this is because we gave our logo documented we uploaded this to the document and we gave this id to the template so that's why we see the company logo here and then this is the cover letter that we saw earlier right so that's what we are saying because the marvel studios is populated dynamically because that's the business name that is associated to the code it has pulled in the date and the code expiry as well and this is our html type of content that we built first so if i scroll down even further this is the other uh type of content that i build just to get the customer information uh this is another html content type for getting the prepared for and the address of the uh customer and prepared by whom if we scroll down even further if you remember we went and created the line and item content and while we defined the section and we associated to the template we defined a few things one we wanted it to be grouped by product family that's why we see the code lines are grouped into hardware software swag here right so those are the product family and anything that doesn't have a product family name associated gets grouped together and comes in the final table so and then we also see that we have a subtotal basically the hardware total the software total the swag total all that is being included here and if you notice here we have five columns the quantity product description unit price and extended the reason we don't see the discount percentage here is that we did not go ahead and check the show discount field which is used as the conditional print field to show the column and uh one other thing that i configured of which we didn't see in detail is that i used the conditional print field on another section to show you how that would work on a section so uh we have created a discount section earlier again for demo purposes i went ahead and created this so what i did was i used the conditional print field here i wanted to show a particular section only if this particular value returns to be true so right now we do not see that section which will technically show you the discount uh value here that's the that's what the section does and also we are not seeing the column discount percentage in the line items table so i'm going to quickly close this cancel this and show you what happens when i check this particular show discount field so it's right here i'm going to check this and i'm going to click on save and let's go ahead and preview document now and let's see what we see here now so if i scroll down i should see a few things one the discount percentage column is now visible right so the salesforce cpq document engine has gone ahead and looked at the conditional print field and ensured that this column is displayed because we have checked the show discount to true and if i scroll down you will also notice this discount total has appeared here so the discount total section was just to bring the discount total and then sum it up and show it at the bottom of this table so this is also appeared here so this is how the conditional print field will come into action value generate documents the same way was the group that we did in the line items where we wanted to group it by product family and the subtotal for each of the categories now let us go ahead and look at the next type of content write the code term sales for cpq includes functionality to dynamically generate a number of terms and conditions so the individual snippets of terms and conditions can be always shown or can be conditionally shown uh for instance like if apple iphone products are purchased on your code then we want additional terms related to those products to render automatically when generating a document so if that's a business case for you we could do that as well while we define the code terms so term conditions on code terms determine whether or not a term should display so we have a separate related list for this to include your conditions uh under which circumstances that you want the code term to be shown or not and if there are multiple conditions that you define then you can use the conditions met field on the code term to let cpq know whether to evaluate all of those conditions or any of those conditions in order for the code term to be displayed we can also allow users to uh modify these terms by selecting modified terms from the code record and again i really want to exercise caution here when i say this because uh salesforce cpq is not a contract lifecycle management application or a redlining tool so please use these modified terms only and only if you need to code terms are intended to only handle lightweight modifications so any modified code terms render in documents generated from the current code only and they're not carried over to any other code like amendment or renewal codes so if you're allowing your sales reps to go ahead and modify the terms on the fly while you're generating the documents uh please note that they are touching the terms and only give them the rights to do so if you really want them to modify it it's like sections like legal information or liability information you don't want anybody to go and make any modifications to those terms so it's highly recommended to use this particular feature with caution first i'm on the template content i've already created one for code term so technically when you click new the type you need to choose is code terms uh this is fairly straightforward there is nothing much that resides on the content itself so we just need to give the content name which is called terms is what i have chosen to give here and then the type is the code terms here the reminder of the configuration we would be doing it in our code template and the code terms object so i'm going to quickly go back to our code template if i go here we will now link our template content to the code template itself through the sections if you notice here i have created a code term section to link the content which we created to the template itself so if you notice here so far we have not defined where the terms and condition itself reside right so we have not defined the individual snippets of language that needs to go into this section so this is where code terms object comes into play so we have an object called code terms where we are going to define the snippets of language that needs to go into terms and conditions so if you notice here i have several terms already described here i'm just going to go ahead and click on one and you would see the auto generator term number and then there's a type and then a print order which is technically the display order of this term should be displayed in which order relative to the other terms and then we have an active checkbox to make this term active uh just below that we see this locked field so this check box is what would control whether the code term is going to be editable by a user or not so if you lock this which is ideally the state for any of your terms and conditions uh which you don't want any other user to modify if you have legal terms if you have privacy terms or any liability terms ensure you lock it for editing so no other user can go and edit this particular term on their code document and then now moving further we have a parent term so if you have multiple terms uh child terms then you could use this parent term field to say under which all the other terms and condition needs to uh group under so uh this is where we will uh kind of link the definition to a definition header right so we can go multiple layers deep and what sales for cpq will do is it will dynamically number them when the document is generated then that's pretty much it and then we have the template content itself that is here which is uh related to the code term so if i go to the related tabs here you will notice that term conditions if you remember i was mentioning that you could dynamically display this term condition based on what you define here say for example i have terms specific to the apple iphone 12 then i could just define a term condition here saying this term condition is what needs to be evaluated to show this particular code term so i could use the tested field or i could use the summary variable here to determine this whether this condition is being met or not so for our example i could say if the product family belongs to say apple phones if that's a product family that i have then i want this code term to be displayed so that is what i would be populating it here i'll quickly cancel out of this and in case you have multiple turn conditions this field is very important conditions met because we would be saying whether salesforce cpq should evaluate all the conditions or any of the conditions for the code term to be dynamically shown on the code document so the code template is where we control the numbering behavior of the terms i was mentioning that we could auto number the terms and have all the child terms under apparent term right so the auto numbering behavior is driven from the code template itself so if i scroll down here we would see a field called number terms only if you check this check box we the salesforce cpq will automatically go and auto number your terms now let's quickly go and look at how do we modify terms on the code so i'm on my uh code record and if i press on this little arrow icon here i would see modify code terms so if i click on this it takes me to this page where i would be able to choose a template since i just have one i'm seeing it here if you have multiple code templates you would see that here and if you notice here if i'm hovering over any of this code terms it says whether i can edit it or not so if i have not locked the code term it's going to allow me to edit it if i click this little pencil icon here i will be able to edit this particular code term if you notice i am unable to edit the next code term it says this code term is logged and like i mentioned earlier it's a best practice to determine whether you want to give this privilege to the sales rep or not because you don't want to go ahead and modify terms which you're not supposed to but again if you have the access to this and if you want to allow your sales tips to modify the quartum this is where they could come on their code click on the modify code terms and modify their terms here and like i mentioned earlier this is only applicable for this particular code document and any modifications that are done here will not be carried forward to any other codes or any amendment or renewal codes either now let us quickly jump back into our code and let's see how our code terms appear in our preview document so i'm just going to click on preview document and i'm going to see how the document looks like so if i scroll down so these are the terms and conditions we defined if you notice here salesforce cpq has gone ahead and auto numbered it so because this was my parent term that is numbered as one and all the child terms have been numbered as 1.1 and 1.2 here and like i mentioned if we have term conditions defined then we could have these term conditions you know fire whether the term should appear in this particular document or not a typical example i mentioned was if we have apple watch products and only then i want some terms and conditions related to the product to appear so those could be configured using the uh term conditions on your code terms now that we looked at uh different types of the template content let's move on and look at what additional documents are so sales for cpq also offers the capability to merge our template content with additional pdf content uh you know to produce the final document so in addition to the code information the customer information the court lines your signature block a lot of times customers will want to include additional documents like you know product and information sheets or specification sheets or even like marketing collateral or your company overview or the corporate overview as a document right so these information can be added as additional documents and it could be included to your code document now let us quickly jump in back to salesforce cpq to see how do we add these additional documents and how does it look now let us see how do we add additional documents so the first step is to upload the document into the documents tab and then come back to your code template here if you go to the related we would see a section for additional documents uh it's a pretty straightforward step if you click on new here you would be able to reference the record id of the document and then give your document a name and the display order if you have multiple additional documents uh whether you want this to be as your first additional document or the second or third or fourth the same best practice applies here as well leave some gaps in between and if this additional document is required which means it should appear in all your code documents and mark it as required here so uh i've already gone ahead and added one additional document here which is iphone 12 product specification sheet so in case you want to offer up certain content only when a product is coded we could create the additional document in a very similar way against the product itself in that case uh instead of creating additional document here on the code template we could uh just go ahead and create it against the iphone 12 product so every time that product is quoted then this additional document is available in the code document for selection uh only if the product is on the code this additional document will show up on the available content on preview code for selection apart from this users can additionally upload their own content as well so if they want to upload your own pdf document they could do that from the code so if i quickly go back to the code i hit cancel here you will see an option to include document again this works in a very similar fashion and you don't want to make this available if you don't want users to be inserting their own documents but it's pretty straightforward you just have to go browse and add your document and your document will appear in your code document for selection but otherwise if i click on preview document here if you see here the additional document that we created against the code template is available here for selection so i just need to select this and add it to my included content along with my code template content and then if i click on preview i should see this uh additional document that we added the iphone 12 specification in our code document so if you notice here here we see all the code template contents that we created right so our code template had this cover page it had this customer information the line item information terms and condition the signature block so unless and until we add additional document that's all you would see but once you have additional documentations included then even that would be embedded in this code document for the customer so this is how you create additional document and include it to your code documents moving on let us look at the allowed document file formats and sales for cpq and the permissions involved so sales for cpq offers users to generate documents in two formats microsoft word and pdf so we can control the ability to generate the documents in microsoft word user by user basis a single code template can support both formats you don't need to create multiple templates to support each of these formats so you just need to have one code template and both the formats would be supported so code document represents a combination of you know the cpq process best engineered to ensure the accuracy consistency so that we get the professionally looking document correct so just mainly for this reason because we have such a great engineered process that sales for cpq document engine offers we recommend using pdf as your output format however if you want to have microsoft word as your output format users with appropriate permission can choose the file format at the time of document generation so you need to have a specific permission in order for you to choose microsoft word as your output format and that is driven user by user basis so if you go on to your user record you would see allow output format change as a checkbox field there and if you check this to true only then the user would be able to generate document in microsoft word format like i mentioned earlier the best practice is to restrict permissions to a very select users like your administrators maybe some operations specialist as you know free editing of the code document counters the cpq's control process so you don't want to be like taking all caution all throughout your template contents creating everything perfectly using the salesforce cpus document engines powerful features all this way and finally give up all that by giving the ability for the user to you know go ahead and modify the content there so be very cautious when you give permissions to allow output format change to users i am back on my code and when i click on generate document this is the place where we see the output format as a field mentioned here so because uh for my user record i have enabled the checkbox to true for the output format change i'm seeing microsoft word as one of the formats here and once i selected as pdf for microsoft word and then i download my document i should be able to see my document generated in that particular format chosen let me quickly go and show you where this particular field resides so if i go on to my user detail you will notice that there is a field for allow output format change so only because this checkbox is checked to true i am saying microsoft word as one of the output format options otherwise pdf is the only format options that i would see if we are using both formats like pdf and microsoft word uh one recommendation is test both of them as you build because small inconsistencies might occur with the format so don't assume that testing pdf is fine and we don't need to test microsoft word separately you might be surprised that you might find some inconsistencies between both these formats while you're testing now that we have defined our code template itself with the multiple different template contents and we saw how to configure additional document let's quickly go ahead and see how our document looks like i'm going to click on generate document on my code and my document language is english i have the correct template selected here i want it in the pdf format and everything looks fine i'm going to add my iphone 12 product specification sheet as well and then i'm going to quickly preview here let me quickly go ahead and download it i'm going to just save it and open it to see how it looks like so this is the code document that we built today so we have our company logo here we have our cover page we have our customer information the prepared for with the address dynamically generated are prepared by information our line items which are grouped by product family and which has subtotals listed here and we have the discount percentage column and the discount section appearing here because we have showed discount on our code set to true and we have conditional print fields that brings this dynamically on this document we have our terms and conditions that we define and they're auto numbered by sales for cpq we have our signature block and if i scroll even further we have our additional document which is iphone 12 product specification which is uh listed here so if i quickly jump back to this code itself and then click on save you will notice that a code document is generated against this code so this is the document name we have the code associated with it this is the first version and it has the template that it is associated with our output format was pdf so all that is listed here so this is how we generate a code document before we wind up this session i wanted to quickly touch upon two other features that are involved in the document generation one is multi-language translation so to enable the multi-language translation in our cpq package settings under documents section you would see this particular check box called enable multi-language translations please ensure this is checked this would allow sales trips to generate code documents in one of the orgs supported languages we must also have translated values stored for the languages that they can select i urge you to go and look at health. salesforce articles in relations to multi-language translations so that you understand how you could create separate template contents for different languages for which you require translations finally uh when we generate document we have options for e-signature so salesforce cpq offers one-click e-signature integrations with and adobe sign so instead of your sales rep downloading the document mailing it to the customer getting it signed physically shipping the copy back uh you know it's it's really not a very easy process right and we could use these digital e-signature platforms which sales for cpq already has integrations with uh like adobe sign and we could use these integrations for getting the e-signatures done in an easier manner there are add-on packages for that for sales for cpq to work with these e-signature applications uh again i urge you to look at how the salesforce articles in relation to e-signature integrations i have not covered that in depth in the session but uh there's a lot of informative articles in how those sales first and please go ahead and look at them in detail to summarize in today's session we looked at an overview of sales for cpq's documentation how do we generate document and the different types of template contents we mainly looked at html line items and the code terms in detail and we also looked at how do we configure additional documents and include it in our code documents uh we looked at few additional functionalities around the line item sections um and we also took a deep dive into sales for cpq to see how all this comes into play while we generate documents and all the different formats sales for cpq allows us to generate documents and the permissions needed and we quickly finally touched upon our a signature integrations multi-language translations thank you for listening in hope you found the session informative thank you apex hours for giving us the opportunity to host the session today
Show moreFind out other generate quote
- Learn how to create digital signature PDF with ...
- Learn how to create document for electronic signature ...
- Learn how to create document for electronic signature ...
- Learn how to create electronic signature with AI
- Learn how to create electronic signature with ...
- Learn how to create electronic signature in Google Docs ...
- Learn how to create electronic signature in Google Docs ...
- Learn how to create electronic signature in PDF with AI
- Learn how to create electronic signature in PDF with ...
- Learn how to create electronic signature in Word with ...
- Learn how to create electronic signature in Word with ...
- Learn how to create email signature in Gmail with AI
- Learn how to create email signature in Gmail with ...
- Learn how to create eSign with AI
- Learn how to create eSign with Artificial intelligence
- Learn how to create eSign documents with AI
- Learn how to create eSign documents with Artificial ...
- Learn how to create eSign for PDF with AI
- Learn how to create eSign for PDF with Artificial ...
- Learn how to create eSign in Word with AI