Revolutionize Your Workflow with an Intuitive Quoting System
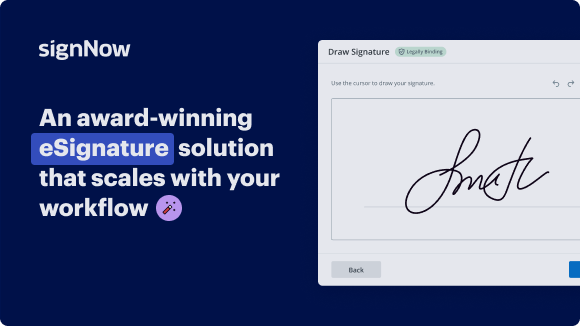
Award-winning eSignature solution


Move your business forward with the airSlate SignNow eSignature solution
Add your legally binding signature
Integrate via API
Send conditional documents
Share documents via an invite link
Save time with reusable templates
Improve team collaboration
See airSlate SignNow eSignatures in action


airSlate SignNow solutions for better efficiency
Our user reviews speak for themselves


Why choose airSlate SignNow
-
Free 7-day trial. Choose the plan you need and try it risk-free.
-
Honest pricing for full-featured plans. airSlate SignNow offers subscription plans with no overages or hidden fees at renewal.
-
Enterprise-grade security. airSlate SignNow helps you comply with global security standards.

airSlate SignNow features that users love


Get legally-binding signatures now!
FAQs
-
What is a quoting system and how does it work?
A quoting system is a tool that helps businesses create, send, and manage quotes quickly and efficiently. It typically automates the quoting process, allowing users to customize templates, track changes, and monitor customer interactions. By leveraging a quoting system, companies can streamline their sales processes and enhance productivity. -
How can a quoting system benefit my business?
Implementing a quoting system can signNowly improve your business's efficiency by reducing the time spent on manual quote creation. It helps ensure accuracy and consistency in pricing, minimizes errors, and enhances customer experience. Ultimately, a robust quoting system can lead to faster sales cycles and increased revenues. -
Does airSlate SignNow offer a quoting system?
Yes, airSlate SignNow provides a comprehensive quoting system that integrates seamlessly with its eSignature features. This allows businesses to generate quotes alongside their document management workflows. With our platform, you can streamline your quoting process while ensuring all your documents are securely signed and stored. -
Can I customize templates in the quoting system?
Absolutely! The quoting system in airSlate SignNow allows you to customize templates to align with your brand and the specific needs of your customers. You can easily modify fields, add your branding elements, and create personalized quotes to enhance engagement and improve conversion rates. -
How does the quoting system integrate with other software?
airSlate SignNow's quoting system integrates with various CRM and project management tools, ensuring a seamless flow of information across platforms. This integration enables users to access customer data, track quote status, and automate follow-up processes efficiently. With these integrations, you can maintain a streamlined workflow and improve collaboration among your teams. -
Is there a mobile app for the quoting system?
Yes, airSlate SignNow offers a mobile app that includes robust features of the quoting system. This allows you to create and manage quotes on the go, ensuring that you can respond to customer requests promptly. The mobile app enhances flexibility and productivity, making it easier for your sales team to engage with clients anytime, anywhere. -
What security measures are in place for the quoting system?
The quoting system in airSlate SignNow prioritizes security with robust encryption protocols and compliance with industry standards. All quotes and documents are securely stored and accessed only by authorized users. This commitment to security ensures that your sensitive business information remains protected while using our quoting system. -
What is the pricing structure for airSlate SignNow's quoting system?
airSlate SignNow offers a flexible pricing structure for its quoting system, designed to cater to businesses of all sizes. Plans are based on the number of users and features required, allowing you to find the best fit for your budget. You can start with a free trial to explore the quoting system's capabilities before committing to a subscription.
What active users are saying — quoting system


Related searches to Revolutionize your workflow with an intuitive quoting system

Quoting system
hello everyone and welcome in today's video we're going to take a look at how a complicated data table can be transformed into a coding tool using Excel let's take this list of goods from a liquor store there are about 3,000 items and we have four properties for each item like description brand size and price we can set up dynamic tables to create inputs that will narrow down the results based on user selection of properties for instance we're going to want to first select from the description than a brand of alcohol and file Desai's this will give us the price of that particular item we're going to be using a form structure where we have each category with its own drop-down selection this means that the description choice will affect the brand chos and the brand will narrow down the size options first level description doesn't depend on any other fields and will be the first input we're going to be creating however the description column has values that repeat several times like a straight bourbon whiskey to make this selection appear like a category we're first going to need to create a list of distinct values under the list sheet we're going to need to concatenate the description and brand columns I'm going to add this into column E we're going to enter the formula a2 and b2 pressing enter is going to give us a combination of these two fields we're going to apply to the rest of the rows then we're going to need to combine all three properties description brand and size or a different column this is going to be the third level of distinct values using the same logic we're again going to apply this to all the rows these two new columns will allow us to compare items from the forum selections in order to create a drop-down list selections and a filtering logic I'm going to copy the description data into a new sheet let's call this new tab distinct here we're first going to select a description list and then go to the data tab and press the remove duplicates I'm going to press ok to continue now on to creating the drop-down input the description values can be used as is when it comes to drop-down input this is because its contents do not depend on the other two to create a drop-down input we need to go to the data tab and select data validation here we're going to select list and then select our unique values list next we're going to need to copy the brand names into this thing sheet but I'm going to make the saddest thing to dust just like we did before by removing duplicates I'm going to want to continue with the current selection pressing okay is going to give us the distinct brands list now we need to add an edger column to create the indexing logic for the brand selection using an if statement we can check whether the selected items exist in all columns if the answer is yes the formula should add one to the sell value above if not it should keep the same value now we're going to create a new column to check for brand and description selection I'm going to call this description distinct and brand this thing this time we're going to concatenate the chord selection and the brand distinct value let's apply this to all the rows we're then going to create a new formula to implement the indexing logic with an if statement we can check whether the selected items exist in all columns you this format will add one to result valuable if the answer is yes if not it will keep the existing value next I'm going to create a basic index now we can create a final formula to look up brand matches from the number list we just created this formula finds the coordinates of from the distinct list and if error function returns the empty values if there are no mismatches you now let's apply this logic to all gross now all we need to do is repeat the same process for Desai's we're again going to need to remove the duplicates and then apply the same logic this time we're going to want to concatenate all three fields the data will be coming from selection let's apply this formula to all Fields and finally we're going to form to size list you now let's go ahead and create a drop-down lists again we go to data validation and select list from these options the source target is going to be from the distinct lists and now we do the same thing for size you the last thing we need to do is setting up the formula to get the price range you our coding tool is now ready we can select a specific item to get its price now let's see how we can you Ravel's designer to create a responsive web application from this workbook the in ranges act as connection points between an excel file and a designer all input and output fields need to be assigned a named range to establish the end points our coding tool contains inputs drop-down lists and output fields that need name ranges to add named ranges we first select the cell and then go to the formulas tab then click define name and enter the desired name here alternatively we can simply select the cell and then start typing in the name into the reference box pressing the enter key will assign the name you once all inputs input lists and outputs have to a named range we can move on to the transforming this workbook into a web application remember to save your file log in to your spreadsheet web account in the control panel we're going to press create a new application and then select designer for the application type next we drag and drop our file into the Excel spreadsheet box we're going to need to assign this application to a group let's select a default group and proceed by pressing next now we're going to need to access the designer module by going back to the control panel and pressing the edit designer application button we need to go to the user interface page to start building the UI this is going to direct us to the user interface portion of the default home page begin by inserting a section by dragging and dropping into the page sections are the main components of the web interface all other modules must be placed within a section now we're going to create a description brand and size selections to add a first input we need to drag and drop a drop-down input into the section box then we're going to need to configure this input to establish the connection with the workbook and change its properties the name range field must be pointed to the corresponding name range from the workbook then we're going to need to select a list of options from the list named range the name field determines the label to be printed before this input in this case the input will say description once the input is defined press the submit button on the bottom of the side part to save your changes now we're going to do the same process for the other inputs the last UI elements we need to create price field to do this we're going to use a content field and place it right under the inputs clicking the content module we go to the Edit content menu to insert the price calculation the content editor allows us to add text media or hyperlinks into a content box next to the product price I'm going to add double curly braces this will give us the available options to insert a named range output selecting price from this list and closing the double curly braces will print the price calculation here click the fullscreen icon to go back and remember to press the submit button to save your changes we are done with the user interface let's preview the application and see what it looks like if everything looks good click publish to make this application all night thank you for watching
Show moreFind out other quoting system
- Unlock the Power of Digital Signature Licitness for ...
- Achieve Digital Signature Licitness for Acknowledgement ...
- Unlock the Power of Digital Signature Licitness for ...
- Unlock the Power of Digital Signature Licitness for ...
- Unlocking the Power of Digital Signature Licitness for ...
- Unlock the Power of Digital Signature Licitness for ...
- Unlock the Legal Power of Digital Signature Licitness ...
- Unlock the Benefits of Digital Signature Licitness for ...
- Unlock Digital Signature Licitness for Junior ...
- Unlock the Power of Digital Signature Licitness for ...
- Unlock the Power of Digital Signature Licitness for ...
- Unlock the Power of Digital Signature Licitness for ...
- Unlock the Power of Digital Signature Licitness for ...
- Unlocking the power of digital signature licitness for ...
- Achieve Digital Signature Licitness for Alternative ...
- Digital Signature Licitness for Alternative Work Offer ...
- Ensuring Digital Signature Licitness for Alternative ...
- Boost Productivity with Legal Alternative Work Offer ...
- Ensure Digital Signature Licitness for Funeral Leave ...
- Digital Signature Licitness for Funeral Leave Policy in ...