Bulk Send Documents for Electronic Signature
Award-winning eSignature solution


How do I use bulk sending?
Bulk inviting means you create a single template then upload a list of people you’d like to invite.
Create a Template
In order to make use of the Bulk Invite feature, you must be inviting from a template. If you have not yet uploaded a document, do so before proceeding.
Make Sure Requirements Are Met
After you’ve created the template, there are a few other requirements that must be met before the Bulk Invite feature is accessible. They are as follows:
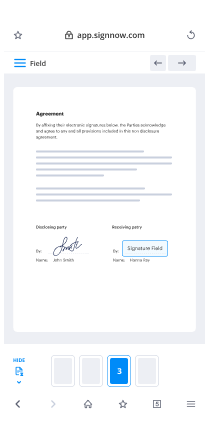
Requirement 1: Set Up Roles On Your Template
There must be at least one role created in your template.
- Open the template
- Click on any field from the Fields section
- When prompted, enter a name for the first role
- You can click on Add Signer if you ever have other signing roles (then click on Done)
- Insert your desired fields wherever you need them
- When finished, click the green Done button
Requirement 2: Ensure Only One Role Is Unassigned
If you have added more than one role, you must ensure that you either:
- Enter a fixed email address OR
- Click in the Sender checkbox (the person who logs in to invite becomes that role)
- Navigate to your template
- Hover over its name
- Click More — Edit Signing Order
- Enter a specific email address or click the checkbox for Sender for all but ONE role
- Click Save Settings
Requirement 3: Lock The Signing Order
If you have only entered a single role, then will automatically lock the signing order for you. If you have added more than one role, however, you MUST click on Save Settings (as shown above) to lock that signing order.
(Optional) In Preparation: Create A Sub-Folder in The Archive
In Step 4 below you will choose a sub-folder within your Archive folder in which to store documents from the Bulk Invite. It can not be created at that time so if necessary please do so before beginning the Bulk Invite process.
- Click on Archive in the left sidebar
- Click on New Folder
- Give your new folder a name when prompted
You’re Ready To Send The Bulk Invitation
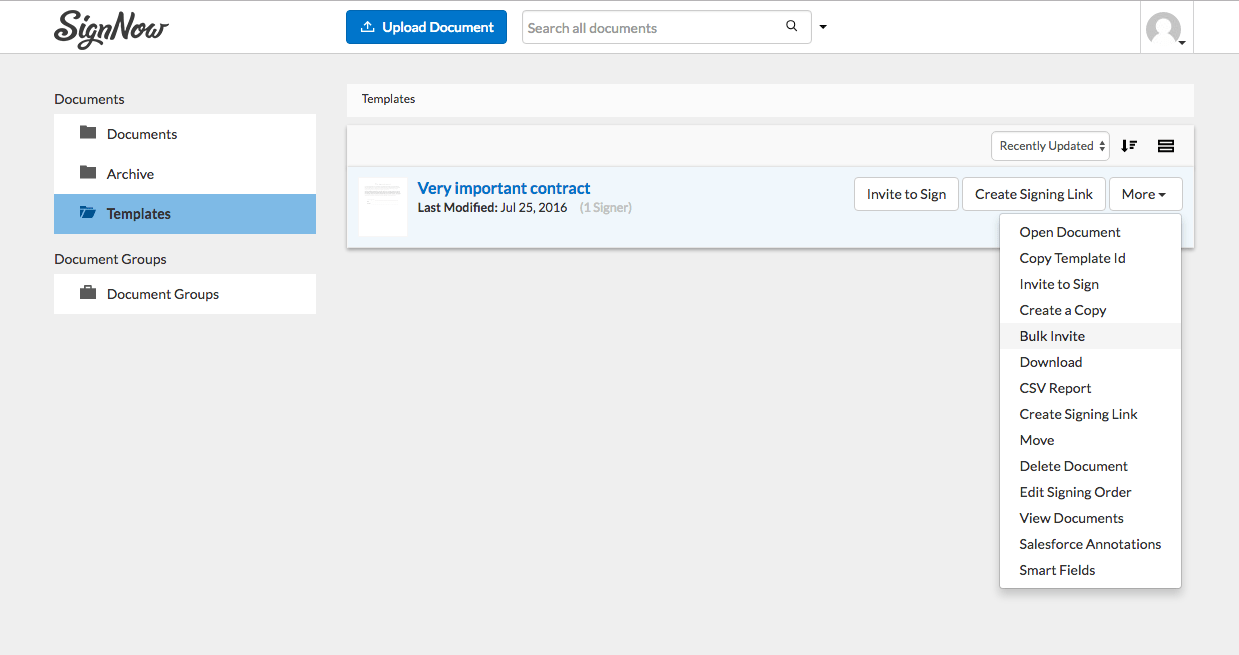
Bulk Invite Step 1: More — Bulk Invite
Navigate to your Templates folder, hover over the appropriate template and click on the More button on the far-right. Then select Bulk Invite to begin the process.
Bulk Invite Step 2: Enter Recipients (CSV Upload or Manually)
You can either upload a CSV (comma separated values) file that contains a column with all of the email addresses or enter them manually into the empty box.
You can also copy a list of email addresses there, and the following should all work:
- Space between email addresses
- Pressing the tab key between email addresses
- Typing a comma between
- Typing a semi-colon between
Bulk Invite Step 3: Choose Document Name
The name you choose here will be prepended to the signer’s email address to create the document name. So if you invite t.sawyer@company.com to sign (and they are the first in the list), and enter BillOfSale the document name will become BillOfSale_0_t.sawyer. NOTE: The number increases with every additional invited signer.
Bulk Invite Step 4: Select Destination Folder
Pick a folder that exists in your Archive folder, to store all of the signed documents. Ideally, you would select a folder that is unique to this set of invites so you can more easily view/track those documents. Creating a folder called “Bulk” in your Archive folder and choosing it every time will lead to an abundance of different documents in there, for example.
Bulk Invite Step 5: Click On Send Now
When you click on Send Now the invites immediately go out. You can also customize the message and/or the subject before sending.
Viewing/Tracking Documents From Bulk Invite
1. You can navigate to the sub-folder that was created within your archive and see the status of each of your documents (document name, who was invited and whether they have signed)
2. You can click on the same More button that you used to access Bulk Invite and instead select View Documents. This allows you to see all of the documents that have been produced from that specific template.
3. There is an optional CSV that you can download that contains the following information for each document: document ID, document name, date created, date updated, invitee.
Archiving documents within your digital workflow
When you decide to digitize your business operations and make them full paperless, organizing your online workplace in the most convenient way becomes no less important than organization and design of your physical office. In a nutshell, you would want to have more free space and you wouldn't want to spend time on scrolling through dozens of the previously used documents.
Deleting older files for good is NOT an option for so many reasons, potential future use of the same documents as templates being only one of them.
Archiving documents is a handy alternative to deleting. In airSlate SignNow, archiving can be carried out for a separate document or in bulk, for multiple documents.
Archive in airSlate SignNow can be organized in multiple folders and sub-folders.
This means you can arrange your archives by years, or projects, or types of activities, or departments, or in any other way convenient for you.
Archiving one specific document is a one-click operation. See the screenshot.
However, when it comes to rearranging your digital workspace, you would probably prefer archiving multiple documents at the same time. In this case, go to Documents and click Bulk Archive button at the top of your Documents list.
Then you can select the folder for archiving and set the time range of the documents to be archived.
Whenever you need to return to an archived document, you can always unarchive it in one click.
See airSlate SignNow eSignatures in action
Choose a better solution
Move your business forward with the airSlate SignNow eSignature solution
Add your legally binding signature
Integrate via API
Send conditional documents
Share documents via an invite link
Save time with reusable templates
Improve team collaboration
Our user reviews speak for themselves


airSlate SignNow solutions for better efficiency
Why choose airSlate SignNow
-
Free 7-day trial. Choose the plan you need and try it risk-free.
-
Honest pricing for full-featured plans. airSlate SignNow offers subscription plans with no overages or hidden fees at renewal.
-
Enterprise-grade security. airSlate SignNow helps you comply with global security standards.

Your step-by-step guide — bulk send documents esignature
How it works


See exceptional results bulk send esign


How to fill in and sign a document online
Experience the easiest way to bulk send documents with ease. Steer clear of paper-based workflows and manage PDF files right from airSlate SignNow. Edit and send out your documents from your workplace or seamlessly while on the go. No installation or extra application necessary. All features are available online, just go to signnow.com and configure your own eSignature process.
A short guideline concerning how to bulk send documents with ease in minutes
- Make an airSlate SignNow profile (if you haven't signed up yet) or sign in with your Google or Facebook.
- Simply click Upload and select one of the PDF files.
- Make use of the My Signature tool to insert your unique signature.
- Change the sample into a dynamic PDF with fillable fields.
- Submit your new contract and then click Done.
After completed, share an invite to sign to several users. Get an enforceable deal within a few minutes applying any device. Explore far more tools for producing impressive PDFs; put fillable fields bulk send documents with ease and collaborate in groups. The eSignature platform offers a secure process and functions based on SOC 2 Type II Certification. Make sure that all your information are guarded and that no person can take them.
How to eSign a PDF in Google Chrome
Are you looking for a solution to bulk send documents with ease directly from Chrome? The airSlate SignNow extension for Google is here to help you. Get a PDF file and right from your web browser easily open it up with the editor. Insert fillable fields for text and signature. eSign the PDF and send it safely based on GDPR, SOC 2 Type II Certification and more.
Using this short how-to guide under, boost up your eSignature workflow into Google and bulk send documents with ease:
- Go to the Chrome web store and find the airSlate SignNow extension.
- Click Add to Chrome.
- Log in to the account or register a new one.
- Add a document and click Open in airSlate SignNow.
- Change the document.
- Sign the PDF using the My Signature tool.
- Just click Done to make edits.
- Encourage other individuals to sign by clicking Invite to Sign and deciding on their emails/names.
Make a signature that's built-in to the processes to bulk send documents with ease and get PDFs eSigned in minutes. Leave behind the piles of papers sitting on your workdesk and begin saving money and time for extra essential duties. Choosing the airSlate SignNow Google extension is a great convenient option with lots of benefits.
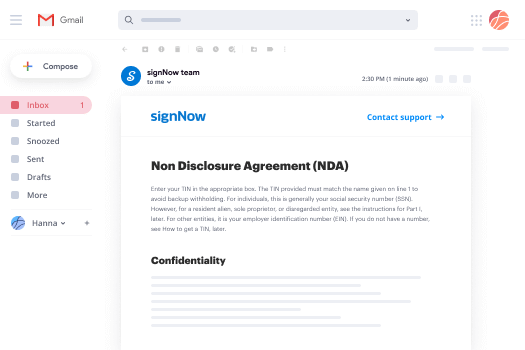
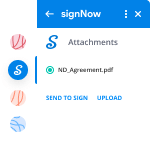

How to eSign an attachment in Gmail
If you're like most, you're used to downloading the email attachments you get, printing them out and after that signing them, correct? Okay, we have very good news for you. Putting your signature on PDF files with your inbox became a lot easier. The airSlate SignNow add-on for Gmail enables you to bulk send documents with ease without leaving your mailbox. Do all you need; put fillable fields and send signing requests in a few clicks.
How you can bulk send documents with ease in Gmail:
- Find airSlate SignNow for Gmail within the from the G Suite Marketplace and then click Install.
- Sign in to your airSlate SignNow profile or create a new one.
- Open up your email with the PDF you have to sign.
- Simply click Upload if you want to save the PDF to your airSlate SignNow account.
- Click Open document to start the editor.
- Sign the PDF making use of My Signature.
- Send out a signing request for the other customers with the Send to Sign button.
- Enter in their email address and tap OK.
As a result, other clients will get notifications telling them to sign the PDF. No need to download the attachment time and time again, just bulk send documents with ease in a few clicks. This add-one is suitable for users who choose concentrating on more important tasks as an alternative to wasting time for practically nothing. Boost your day-to-day compulsory labour with the award-winning eSignature platform.
How to sign a PDF on the go with no app
For many products, getting offers done on the go means installing an application on the smartphone. We're very happy to say at airSlate SignNow we've created singing on the go quicker and easier by eliminating the need for a mobile app. To eSign, open up your browser (any mobile browser) and try out immediate access to airSlate SignNow and its effective eSignature features. Edit docs, bulk send documents with ease and a lot more. No set up or additional software required. Handle your offer from everywhere.
Take a look at our brief recommendations that show you how you can bulk send documents with ease.
- Open your internet browser and go to signnow.com.
- Log in or create a new account.
- Upload or open the PDF file you wish to change.
- Put fillable fields for text, eSignature and date.
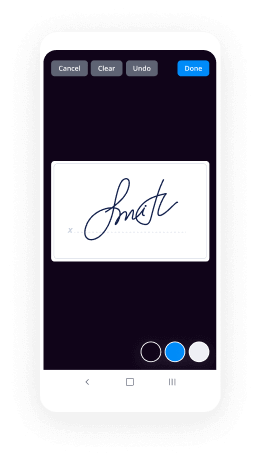
- Draw, type or upload your eSignature.
- Click on Save and Close.
- Click Invite to Sign and enter a recipient's electronic address if you require other people to eSign the PDF file.
Working on documents with mobile is no different than with a desktop: build a reusable template, bulk send documents with ease and handle the flow as you would usually. In several minutes, get an enforceable contract that you can download to the internal storage and share to other people. But, if you truly want a software, download the airSlate SignNow mobile app. It's secure, quick and has an intuitive interface. Take advantage of in easy eSignature workflows from your business office, in a taxi or on an airplane.

How to sign a PDF using an iPhone
iOS is an extremely well-liked operating system packed with native instruments. It lets you eSign and edit PDFs making use of Preview with no extra software. However, as great as Apple's feature is, it doesn't give any automation. Enhance your iPhone's abilities by taking advantage of the airSlate SignNow application. Utilize your iPhone or iPad to bulk send documents with ease and much more. Present eSignature automation for your mobile workflow.
Signing with an iPhone has never ever been so easy:
- Get the airSlate SignNow application in the AppStore and set it up.
- Create a new profile or log in with the Facebook or Google.
- Simply click Plus and upload the PDF you would like to sign.
- Click in the document exactly where you need to put in your signature.
- Discover other features: add more fillable fields or bulk send documents with ease.
- Use the Save button to apply the adjustments.
- Send your PDF files through email or using a singing link.
Come up with a professional-looking PDFs right from your airSlate SignNow application. Get the best from your time and work from anyplace; in your house, work, on a bus or airplane, as well as at the beach. Deal with a full PDf file process seamlessly: build reusable templates, bulk send documents with ease and work on PDF files with partners. Transform your device into a highly effective company tool for executing deals.
How to eSign a PDF taking advantage of an Android
For Android users to deal with documents using their phone, they have to find and install additional software program. The Play Market is large and plump with options, so finding a good app isn't too difficult if you have time and energy to read through a huge selection of apps. To save efforts and protect against disappointment, we advise airSlate SignNow for Android. Store and modify PDFs, generate signing roles, and even bulk send documents with ease.
The 9 basic steps to optimizing your smartphone workflow:
- Open the mobile app.
- Log in with your Facebook or Google profiles or register if you haven't signed up already.
- Select + to add your document making use of your camera, internal or cloud storages.
- Click anyplace on your PDF file and put in your eSignature.
- Click OK to agree and eSign.
- Try out much more enhancing features; put pictures, bulk send documents with ease, build a reusable template, etc.
- Click on Save to make modifications as soon as you finish.
- Download the PDf file or send it via email.
- Make use of the Invite to sign tool if you would like set And send a signing link to users.
Change the mundane and routine into easy and smooth using the airSlate SignNow application for smartphone. Sign and share templates for signature from anywhere you're connected to the internet. Create good-looking PDFs and bulk send documents with ease with couple of clicks. Created a faultless eSignature process with only your mobile phone and improve your total efficiency.
Get legally-binding signatures now!
FAQs bulk signature e signature
-
How will my recipients understand where to sign?
Each of your signers will be automatically guided to the fields they are required to complete. If they disable the Wizard, they will still be able to easily locate the boxes they need to fill and sign. Just make sure to assign your fields to the correct signers. -
Will all my signers receive a document at the same time?
You can either send your document to every recipient at once or set up multiple signing steps so that each signer (or group of signers) receives the document in a specific order. -
How do I configure a signing order for my document?
Click Edit Signers in the editor. In the pop-up, click on the Signing Step 2 area to create a new signing step. To add a third signing step, click Signing Step 3, and so on. Enter signer emails for each signing step. Drag and drop signers to move them between signing steps. When finished, click Save Signers. -
How do I assign signer roles?
Open your document in the editor and click Edit Signers in the menu on the left. Then, click on the silhouette icon below the email field, enter a signer’s email address, and hit Save Signers. Alternatively, you can click on any field in a document, open the Role dropdown on the right, and select Add Role. In a new dialog box, enter another signer’s name and click Add New Role. -
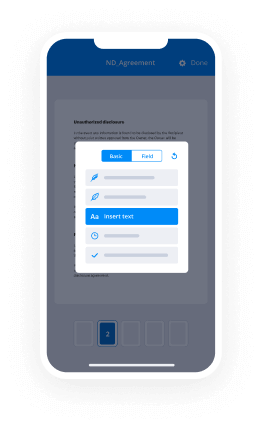
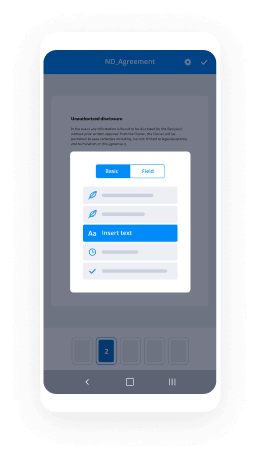
How do I add a fillable field to a document?
Open your document in the airSlate SignNow editor and select the fillable field you need from the toolbar on the left. Then, click anywhere on the document to place the field. You can adjust its size and placement as needed. When finished, click OK. -
How do I send a document to someone to sign?
Upload a document to your airSlate SignNow account and click Invite to Sign. You can also send a document for signing as a freeform (without fillable fields) or share it via a signing link. -
How do I create a template on a mobile device?
To make a template, simply tap on a document and select Make Template in the menu that appears next. Enter a template name in the pop-up and tap Create. Your template is now ready. -
Do signers need an airSlate SignNow account to sign my documents?
No, recipients can sign your document on both desktop and mobile devices without having to register with airSlate SignNow. -
Can I set validation parameters for my fields?
Yes, you can. By setting validation parameters for each field, you ensure that your recipients enter data in the correct format, and thus minimize errors during the completion process. To set a validator, select the field you need in the editor and open the Validation Type dropdown in the right-hand sidebar. Select the validation option you are looking for and click Ok. -
What is a field validator?
By setting validation parameters for each field, you ensure that your recipients enter data in the correct format, and thus minimize errors during the completion process. To set a validator, select the field you need in the editor and open the Validation Type dropdown in the right-hand sidebar. Select the validation option you are looking for and click Ok. -
How do I add a fillable field to a document?
Open your document in the airSlate SignNow editor and select the fillable field you need from the toolbar on the left. Then, click anywhere on the document to place the field. You can adjust its size and placement as needed. When finished, click OK. -
How do I change the size and position of a fillable field?
Once your fillable field is on a document, you can drag it across the page until you find the proper position for it. Drop the field wherever you see fit. To adjust its size, drag the field by its edges (anchor points). -
How do I send a document to someone to sign?
Upload a document to your airSlate SignNow account and click Invite to Sign. You can also send a document for signing as a freeform (without fillable fields) or share it via a signing link. -
How do I import a document from email on iOS?
Go to your inbox and open an email that contains a document attached to it. Open the attachment and tap the Share button. Scroll down the sharing menu and tap Sign with airSlate SignNow. Choose who is going to sign your document: only you or you and other signers. Your document will open in the airSlate SignNow editor. Sign the document or add fillable fields and tap Done > Save. Enter the name of your document and save it. -
How do I capture a document’s photo with the airSlate SignNow app for iOS?
Tap Create in the app’s bottom panel and select Camera. Allow airSlate SignNow to access your device’s digital camera and take a picture of a document. The photo will automatically open in the editor where you can add annotations and fillable fields to it. When finished, tap Done in the top right corner to save the document. -
Can I email a copy of a signed document to someone from my iPhone?
Sure! Once you’ve added your signature in the editor and saved your document, tap ••• next to it and select Email a Copy. Enter your recipient’s email address, add CC’d recipients if needed, customize the subject line and message of your email, and tap the up arrow button in the top right corner to send out your document.
What active users are saying — bulk documents signing


Related searches to bulk electronic e signature
Frequently asked questions
How do you generate a document and apply an electronic signature to it?
How do I add an electronic signature to a Word document?
How do you add an electronic signature to a form or contract?
The ins and outs of eSignature


Find out other send bulk e signature requests
- ESignature Legality for Assignment of Partnership ...
- Ensuring eSignature Legality for Assignment of ...
- Ensuring eSignature Legality for Stock Certificates in ...
- ESignature Legality for Stock Certificate in Australia
- Unlock eSignature Legality for Stock Certificate in ...
- Ensuring the Legality of eSignatures for Stock ...
- ESignature Legality for Stock Certificate in India
- ESignature Legality for Stock Certificate in Canada
- Unlock the Power of eSignature Legality for Stock ...
- Ensuring eSignature Legality for Terms of Use Agreement ...
- ESignature Legality for Stock Certificate in United ...
- Ensuring eSignature Legality for Terms of Use Agreement ...
- ESignature Legality for Terms of Use Agreement in ...
- Ensuring eSignature Legality for Terms of Use Agreement ...
- Unlock eSignature Legality for Terms of Use Agreement ...
- Optimize your Terms of Use Agreement with eSignature ...
- ESignature Legality for Terms of Use Agreement in UAE - ...
- Ensure eSignature legality for Trademark Assignment ...
- ESignature Legality for Terms of Use Agreement in ...
- Unlocking eSignature Legality for Trademark Assignment ...